FILTER Signals – How Do They Work
Filter Signals are used to create Long and/or Short filters that allow your Auto Entries to enter trades. This can be any Auto Entry built in to the Predator or another Custom ENTRY Signal.
Think of the FILTER signals as an ON/OFF switch that will allow or prevent trades from taking place. Anytime you want to allow Long trades, you must turn ON the Long filter. Anytime you want to prevent Long Trades, you must turn OFF the filter. The same is true for Short Filters. It is just an ON/OFF switch.
We will not cover the specifics of how to get a proper TAG for a signal in this section. Please see ‘What Signals Work With The Predator?‘. We will only cover how the Filter Signals work.
Filter Objects
How Filtering Object Signals Work:

In the example above, we are using a modified Trend Magic indicator that prints signals on the chart. Instead of entering trades at these points it switches between Green and Red, we instead change our bias between Long and Short. We then use a Reversal Entry to actuall enter the trade depending on the direction of our Filter.
⤷ On the left side in red after the ‘DOWN’ signal. You can see only bearish Reversals get colored in because our Filter is to the Short side. Making only Short trades valid during this period
⤷ On the Right side after the ‘UP’ Signal. You can see only the bullish Reversals are colored in because our filter is now turned on to the Long side.
It is important to remeber. Just like a light switch. If you turn ON your Filter to one side, you must turn it OFF again when you want to stop taking trades in that bias.
You can turn both ON at the same time and they can both be Turned OFF at the same time.
The second part of this video shows a good example of how Filters work with the Predator.
Colour Identifier:

If your Signal Tags are IDENTICAL they will require a Colour Identifier. Only use a Colour Identifier if your Tags are the same, it is not required if your Tags are already different.
Select the Colour Identifier Box and you will see Long & Short Signal Colours appear. Select the EXACT Colour that corresponds to your Tag as shown in the Drawing Objects Properties. Same as your Tag, if you select the wrong colour The Predator will not be able to validate your signals.
Filter Validation System:
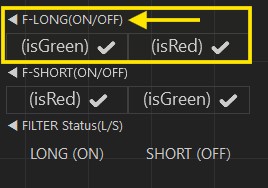
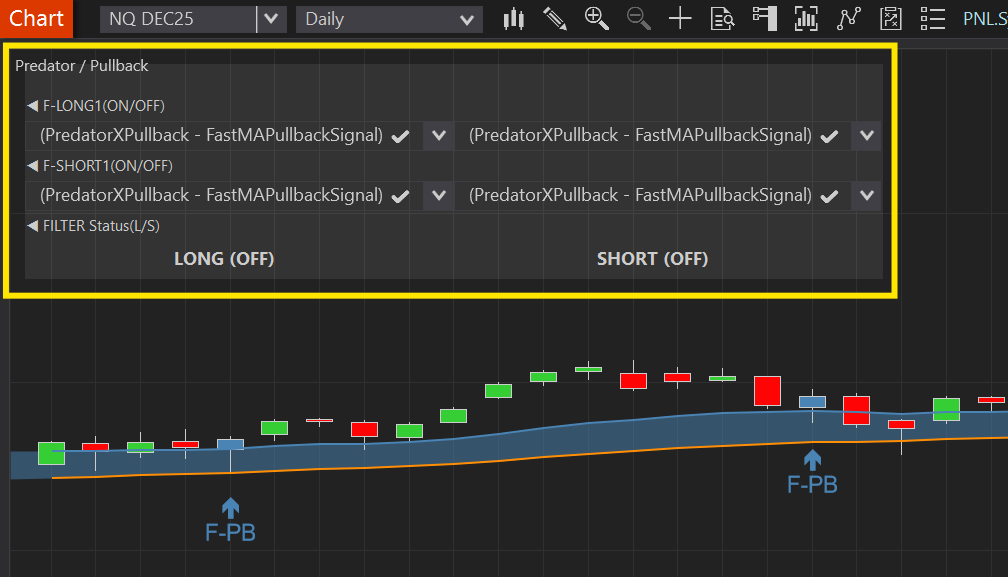
F-LONG(ON/OFF):
⤷ Left column is to turn ON your LONG Filter.
⤷ Right column is to turn OFF your LONG Filter.
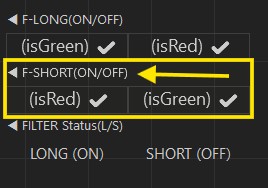
F-SHORT(ON/OFF):
⤷ Left column is to turn ON your SHORT Filter.
⤷ Right column is to turn OFF your SHORT Filter.
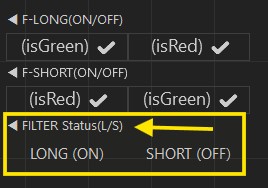
FILTER STATUS:
⤷ Will Display what Filters are currently ON or OFF.
⤷ These are also Buttons that can be pushed to manually override the Filters.
Filter Plots
How Filtering Object Signals Work:
The Filter System will work very similarily between the Draw Objects and the Plots.
You can Filter your trades with up to 3 Plot Filters. These will work as On/Off Switches that will Signal The Predator X to take trades when all your Filter Conditions are met. It is important to remember. Just like a light switch. If you turn ON your Filter to one side, you must turn it OFF again when you want to stop taking trades.
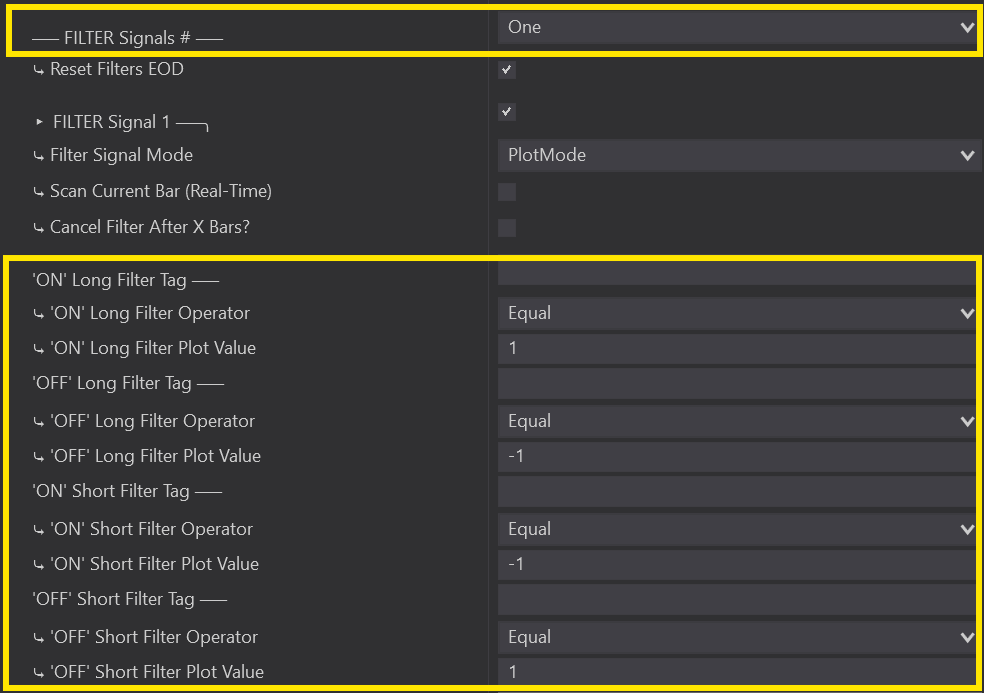
To set up your Plot Filters, head into the Predator Properties and scroll down to the Custom Signals Section under Auto Entries.
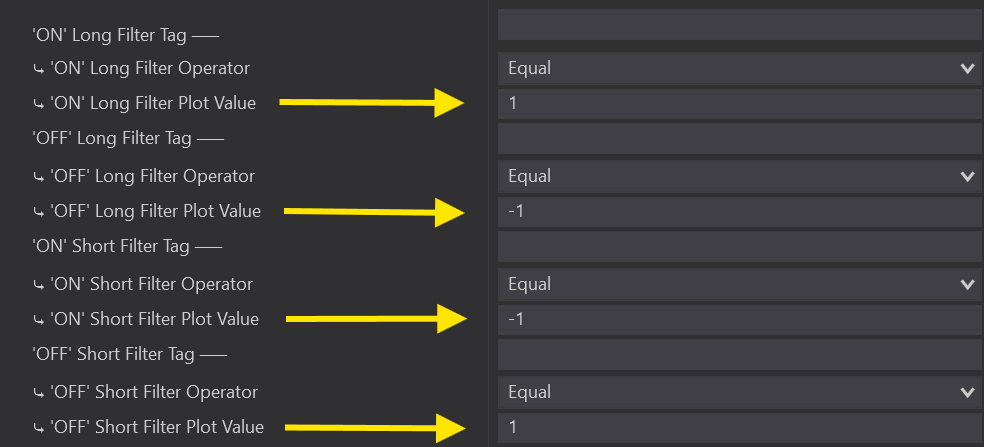
Select the Amount of Filters you would like and then all we need to input is out Filter Signals. By default the Filter System will be set up the same as the Entry System with a +1/-1 Plot Signals. Update these to the Plot Signals you need to use for your Indicator. Don’t worry about inputting your Plot Signal Tag as these can be selected directly from your Charts Validation System.
Another feature you can use with your Filters is the ‘Cancel After X Bars’ option.
This option will just allow you to define an amount bars that will be allowed to pass before your Signal is automatically turned off. So for example if your Filter is turned ON and after 5 Bars have closed we still have not received an Entry Point then our Filter Signal will automatically turn off.

Extremely Important To Note: Your Filter Signals are just that – FILTERS – You will need to have an Auto Entry set up that your Filters will be Filtering. This can be and MA, Inside Bar, Reversal, or even Custom Entry Signals. If you only set up a Filter with no other Auto Entry you WILL NOT receive any Filters and you The Predator won’t take any Trades!
Once you have your Filters all set up and your Auto Entry is in place, set up any Order Management or Filters that you would like and enable on your Chart.
Validation System:
Once you have The Predator loaded on your Chart, either wait for a price change in the market or click the Plots Button on the top of your NinjaTrader Chart Panel in order for your Plots to available to select.
Now you will be able to select the Filter Signal Plot you need to use. F-LONG will be your Long Entry Signal and F-SHORT will be your Short Entry Signal. Make sure you select the correct Plot Signal, some Indicators will have many Plots for your to choose from so always ensure you have selected the correct one!
Once selected, The Predator will take any trades once your parameters have been met and your Filter Signals turn on.
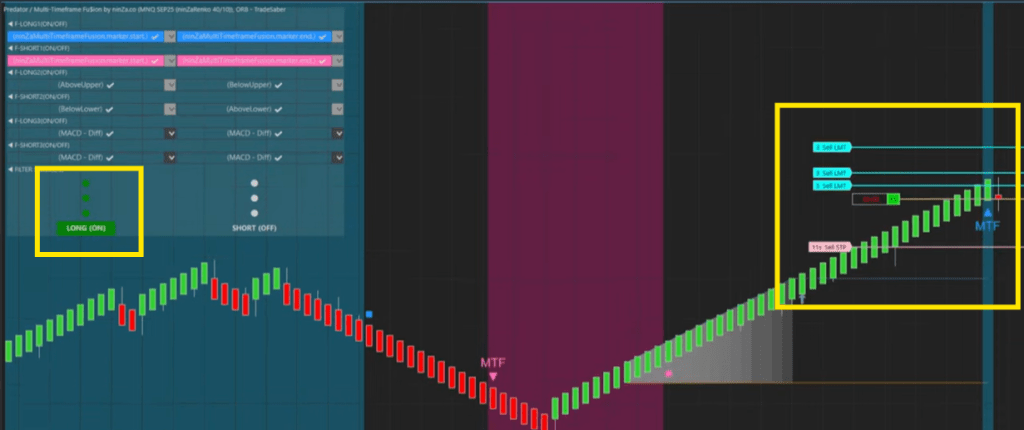
Combine Signals
Combining Filter Signals:
Have you ever had multiple Indicators you wnat to use at the same time in order to get the perfect entry? Well now you can! Unlike just a normal Filter where you need an Auto Entry to Filter your Trades, this feature allows you to combine your 2 or 3 Indicators together all within the Filter Section and use the combination to enter a trade.
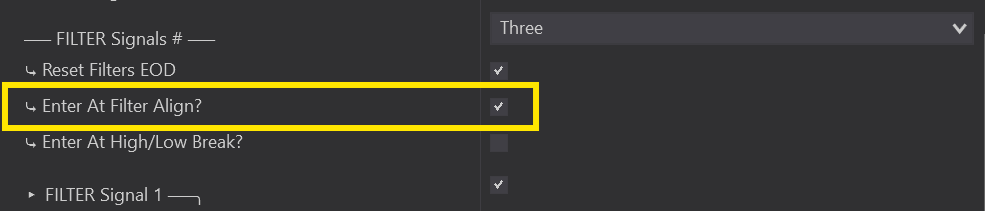
To do this make sure you have the ‘Enter At Filter Align’ selected. This option will only appear once you select 2 or 3 Filter Signals. So if you open the Filter Signal section and don’t see it right away don’t be alarmed!
You will also be able to select the Enter At High Low Break if your Strategy calls for it, or you can always leave this blank as well.
Set up all 2 or 3 of your Filters based on each of your Indicators. Make sure to set your Order Management and any other Additional Filters you need and then enable on your Chart.
Once enabled if you are using Plots, make sure to select them from your Validation system for each of your Filters. So in the below example we used 3 Indicators so we had to select the Plot Signals for all 3 Indicators for both our LONGS and our SHORTS.
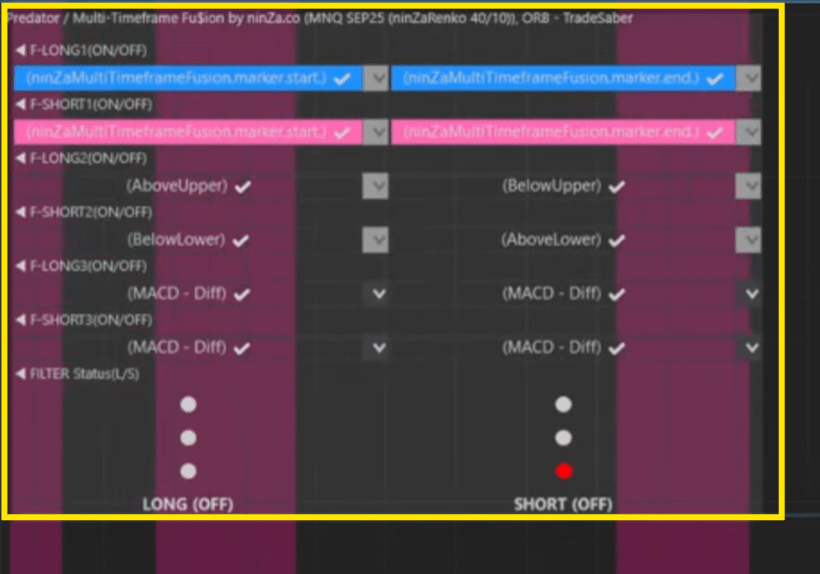
You will also notice the 3 Dots above you LONG and SHORT. When your Filters are all in alignment all 3 dots will be coloured and that will send a signal to The Predator that an Entry can take place once all our Order Managemnt or Additional Filters have been met.